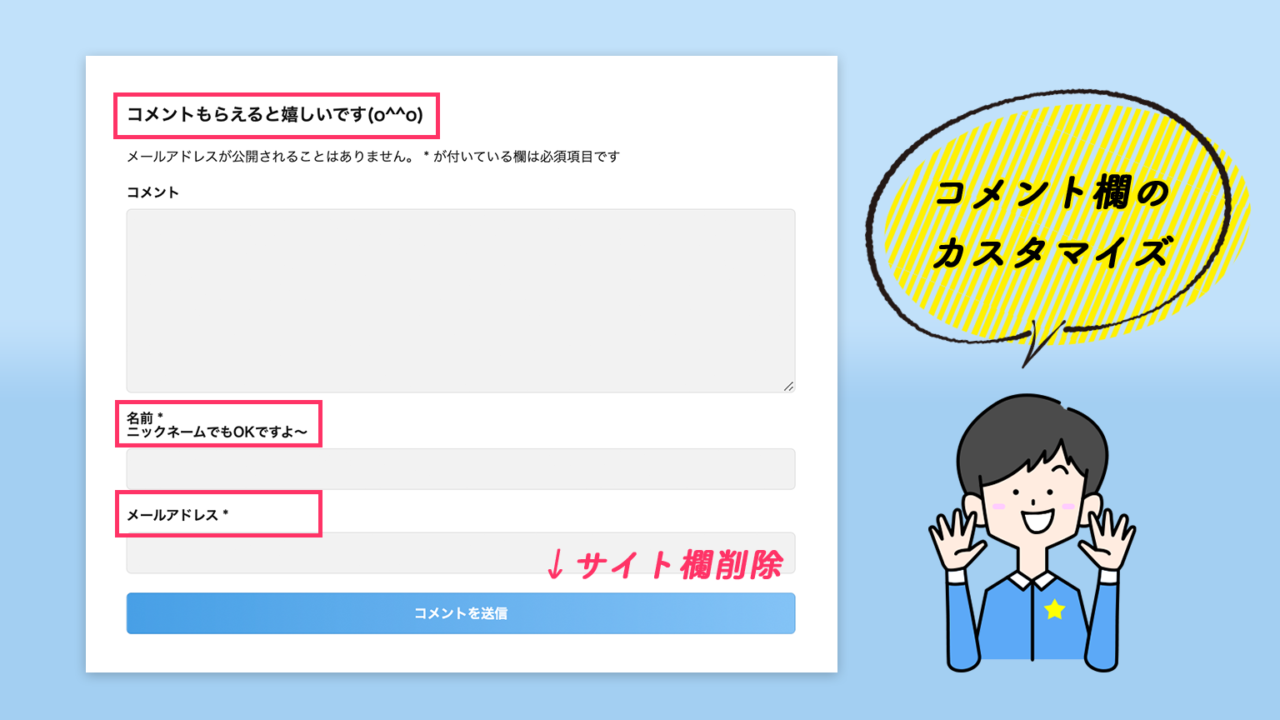
今回はWordPressのテーマの機能である、記事のコメント欄にちょっとした文言を追加したい場合のカスタマイズ方法をご紹介しようと思います。
↓2つのファイルを使って対応します。
- THE THORのテーマ内のPHPファイル
- WordPressのテンプレートファイル
②のファイルは、どのWordPressテーマを使っていても共通のファイルになるので、カスタマイズの参考になると思いますよ。
 みみこ
みみこ他のテーマを使っていてもカスタマイズできるのはいいですね♪
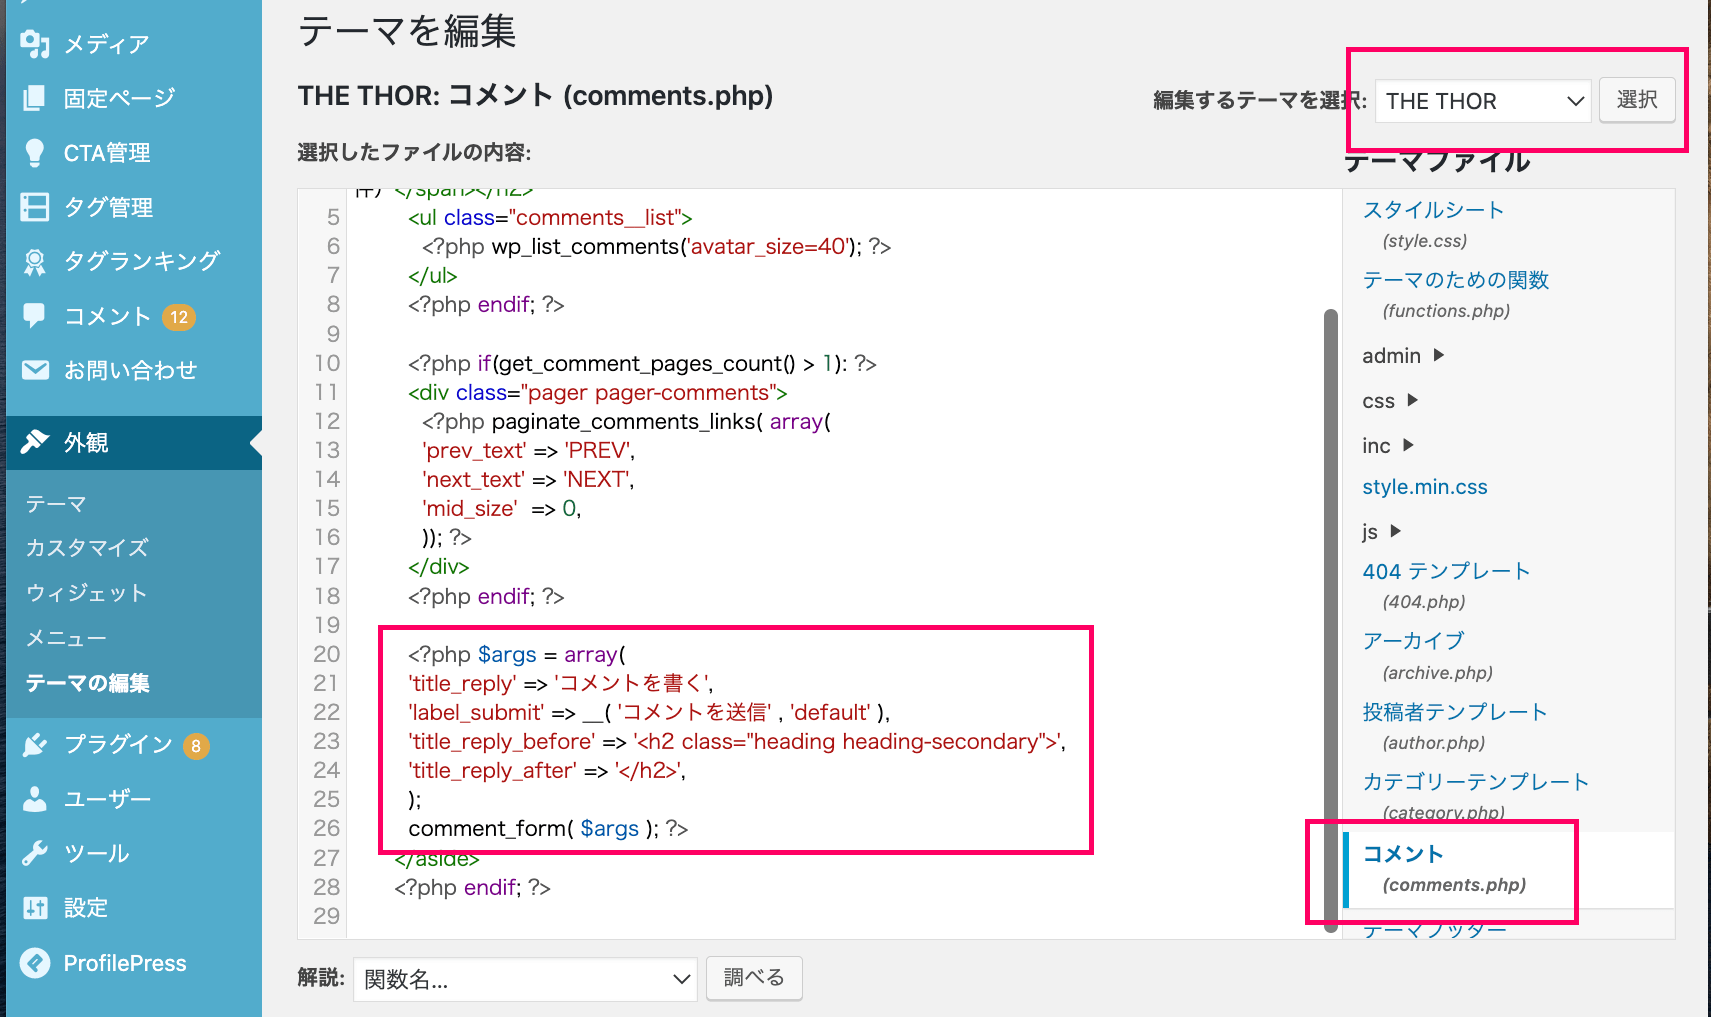
THE THORのファイル
「wp-content > themes > the thor > comments.php」
↑にあるcomments.phpファイルを使います。
ただし、親テーマではなく、必ず子テーマに複製してから、
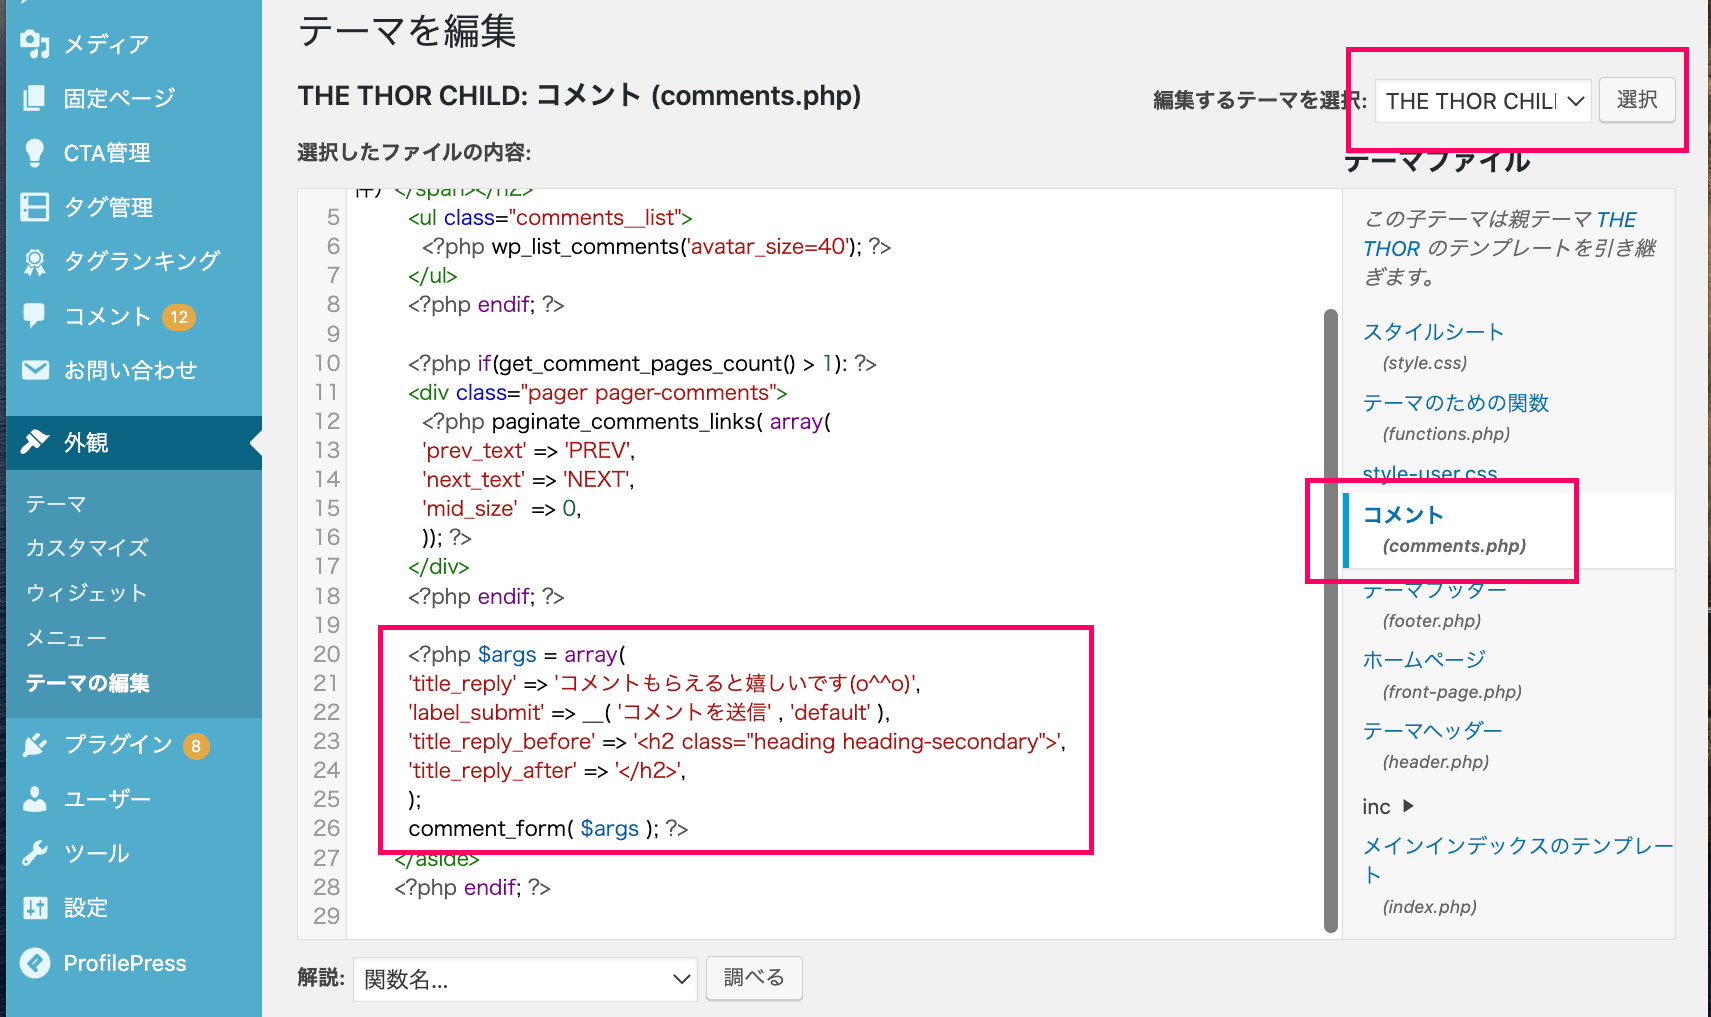
「wp-content > themes > the thor child > comments.php」
のファイルを編集しましょう。
<親テーマの場所(右上がTHE THOR)>
<子テーマの場所(右上がTHE THOR CHILD)>
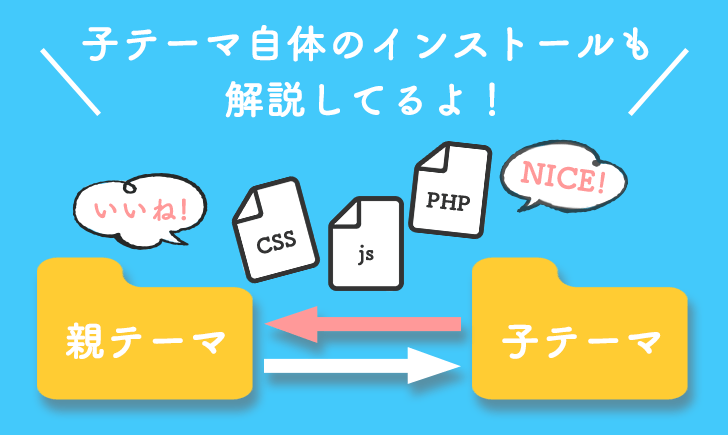
子テーマについてはこちらで解説しています↓
変更前のコード
<?php $args = array(
'title_reply' => 'コメントを書く',
'label_submit' => __( 'コメントを送信' , 'default' ),
'title_reply_before' => '<h2 class=”heading heading-secondary”>',
'title_reply_after' => '</h2>',
);
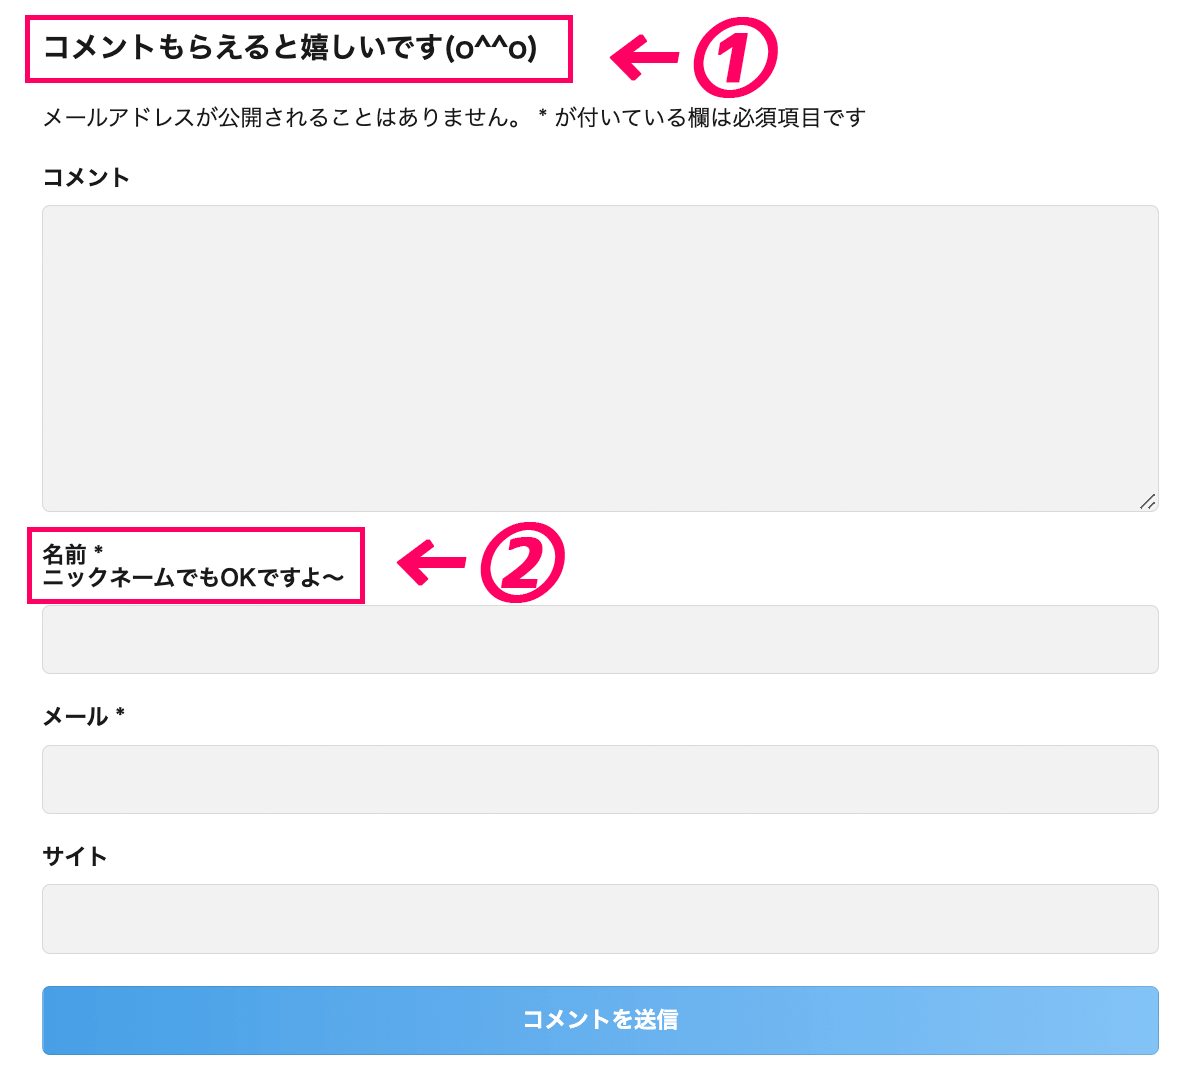
comment_form( $args ); ?>コード内の「コメントを書く」の文字を、↓のようにします。
変更後のコード
<?php $args = array(
'title_reply' => 'コメントもらえると嬉しいです(o^^o)',
'label_submit' => __( 'コメントを送信' , 'default' ),
'title_reply_before' => '<h2 class=”heading heading-secondary”>',
'title_reply_after' => '</h2>',
);
comment_form( $args ); ?>
WordPressのテンプレートファイル
今度は、WordPress共通で使われている↓のファイルを使います。
「wp-includes > comment-template.php」
子テーマとかはないので、同じ箇所に上書きをするので、こちらも必ずバックアップを取って上書きしましょう^^
最初は↓のようになっています(コードの一部を抜粋)。
$fields = array(
'author' => '<p class="comment-form-author">' . '<label for="author">' . __( 'Name' ) . ( $req ? ' <span class="required">*</span>' : " ) . '</label> ' .
'<input id="author" name="author" type="text" value="' . esc_attr( $commenter['comment_author'] ) . '" size="30" maxlength="245"' . $html_req . ' /></p>',
'email' => '<p class="comment-form-email"><label for="email">' . __( 'Email' ) . ( $req ? ' <span class="required">*</span>' : " ) . '</label> ' .
'<input id="email" name="email" ' . ( $html5 ? 'type="email"' : 'type="text"' ) . ' value="' . esc_attr( $commenter['comment_author_email'] ) . '" size="30" maxlength="100" aria-describedby="email-notes"' . $html_req . ' /></p>',
'url' => '<p class="comment-form-url"><label for="url">' . __( 'Website' ) . '</label> ' .
'<input id="url" name="url" ' . ( $html5 ? 'type="url"' : 'type="text"' ) . ' value="' . esc_attr( $commenter['comment_author_url'] ) . '" size="30" maxlength="200" /></p>',
);この中の、「2行目にある、<span class=”required”>*</span>」というところを変えます。
「ニックネームでもOKですよ〜」と<span></span>の間にテキスト入力し表示させています。
また、「<br>」を挟むことで、改行させています。
変更後のコード
$fields = array(
'author' => '<p class="comment-form-author">' . '<label for="author">' . __( 'Name' ) . ( $req ? ' <span class="required">*<br>ニックネームでもOKですよ〜</span>' : " ) . '</label> ' .
'<input id="author" name="author" type="text" value="' . esc_attr( $commenter['comment_author'] ) . '" size="30" maxlength="245"' . $html_req . ' /></p>',
'email' => '<p class="comment-form-email"><label for="email">' . __( 'Email' ) . ( $req ? ' <span class="required">*</span>' : " ) . '</label> ' .
'<input id="email" name="email" ' . ( $html5 ? 'type="email"' : 'type="text"' ) . ' value="' . esc_attr( $commenter['comment_author_email'] ) . '" size="30" maxlength="100" aria-describedby="email-notes"' . $html_req . ' /></p>',
'url' => '<p class="comment-form-url"><label for="url">' . __( 'Website' ) . '</label> ' .
'<input id="url" name="url" ' . ( $html5 ? 'type="url"' : 'type="text"' ) . ' value="' . esc_attr( $commenter['comment_author_url'] ) . '" size="30" maxlength="200" /></p>',
);
おかぴー
おかぴー小さな「 . 」「’」などが一つでも抜けるとエラーになるので注意してください。
また、上記コード内のそれぞれの対応部分をまとめると、↓のようになっています。
‘author’:「名前」欄
‘email’:「メール」欄
‘url’:「サイト」欄
いかがでしたでしょうか。
コメント欄の使い方次第では、あなたのファンが増えるきっかけを作ることができるので、
ぜひあなただけのコメント欄を作って、読者の方とのコミュニケーションを楽しんでみてくださいね(*^^*)
 みみこ
みみこやっぱり最後は読者さんとのコミュニケーションが大事ってことですね!
コメント